You just got your first skateboard or BMX bike. The Texas sun is blazing, and that new ramp in your driveway looks like an invitation to fly. But before you drop in, a hard truth hits you: one wrong move on a hot afternoon can turn a session into a trip to the ER. Ramp accidents are the leading cause of skatepark injuries among beginners, especially in states like Texas where concrete surfaces bake hard and temperatures soar. This article covers every aspect of beginner ramp safety Texas riders need to know, from gear checks to weather awareness and proper falling techniques. You do not need to be a pro to ride safely—you just need the right knowledge.
Why Is Ramp Safety Different for Beginners in Texas?
The Unique Challenges of Texas Heat and Surface Conditions
Texas summers push concrete temperatures above 140°F. Riding on a scorching ramp surface not only burns your skin on a fall but also reduces wheel grip. When your wheels get too soft from the heat, they slide unpredictably. Beginners often do not anticipate this loss of traction, leading to sudden falls. Always test the surface temperature with the back of your hand before riding. If it feels too hot to touch, it is too hot to ride.
How Humidity Affects Your Brakes and Balance
High humidity in coastal areas like Galveston or Houston creates moisture film on metal ramp coping. This makes grinds and axle stalls dangerously slippery. For beginners, this means your safety gear needs extra grip. Use chalk on your hands and shoes, and dry the ramp edge with a towel before each run. Humidity also makes you sweat faster, which reduces your grip on the board or handlebars.
Why Local Ramp Construction Matters
Texas ramps vary widely—from backyard DIY plywood structures to public concrete parks. Many homemade ramps lack proper transition curves, which means beginners face sudden flat spots that cause wheel bite. Always inspect a ramp for loose screws, splintered wood, or cracks in concrete before riding. Never assume a ramp is safe just because it looks sturdy.
What Essential Safety Gear Do Beginners Need?
Helmets Are Non-Negotiable: Choosing the Right Fit
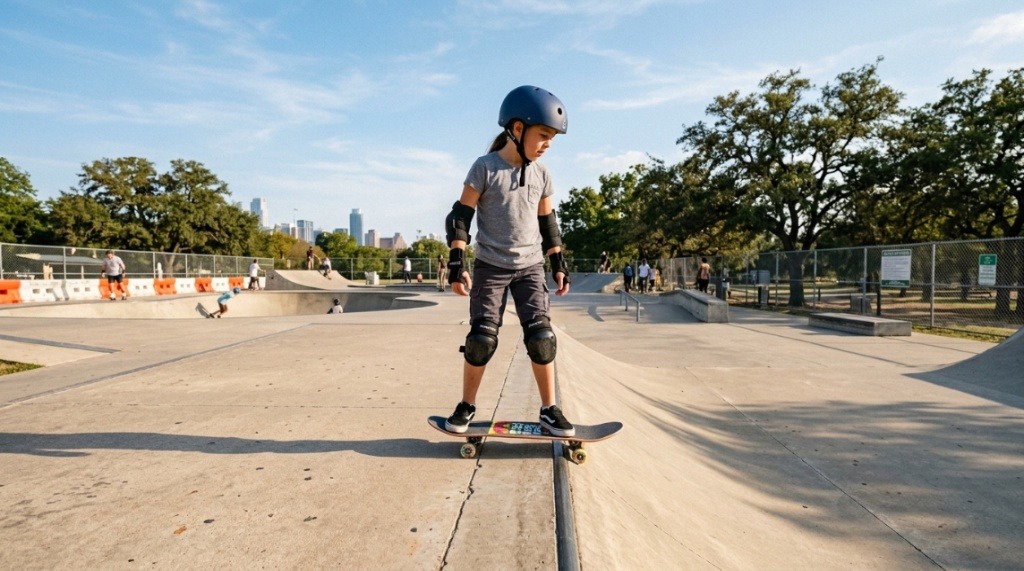
A multi-sport helmet that meets CPSC or ASTM standards is your most critical piece of gear. In Texas, the heat makes you tempted to skip the helmet, but brain injuries do not care about the weather. Your helmet should sit level on your head, not tilted back. The straps should form a V under your ears, and you should not be able to move the helmet more than one inch in any direction. Replace any helmet after a hard impact.
Pads That Protect: Wrist, Knee, and Elbow Guards
Beginners fall forward most often, so wrist guards are essential. They prevent the instinctive hand-first landing that breaks wrists. Knee and elbow pads should have hard plastic caps with foam padding underneath. Avoid cheap foam-only pads—they shred on rough Texas concrete. Look for pads with strap closures that stay tight even when you sweat.
Footwear and Gloves for Better Control
Flat-soled skate shoes with good ankle support give you the grip you need on a board or BMX bike. Avoid running shoes with thick tread—they catch on grip tape. For BMX riding, full-finger gloves with padded palms prevent blisters and improve handlebar grip, especially when your hands get sweaty in the Texas humidity.
How Should Beginners Prepare Their Ramp Before Riding?
Inspect for Structural Weakness Every Time
Before your first run, walk the entire ramp. Check for loose bolts, cracked wood, or rusted metal. For wooden ramps, press down on the surface to feel for soft spots where the plywood might be rotting. For concrete ramps, look for pebbles or debris that can cause wheel slides. Never assume a ramp is safe because it was fine last week—Texas weather changes everything fast.
Clear the Landing Zone and Run-Up Area
Texas winds often blow leaves, dirt, and trash onto ramps. Your landing zone must be completely free of obstacles, including loose gravel, puddles, or even small rocks. A pebble the size of a pea can stop your wheel dead and send you over the handlebars. Sweep the area and check for ant hills or cracks that could trip you up.
Adjust Ramp Angle for Skill Level
If your ramp has adjustable transition or height settings, set it to the mellowest angle for your first session. A 45-degree transition is safer for beginners than a steep 60-degree wall. You can increase the angle gradually as you build confidence. Beginners should never start on a vertical ramp—that is a recipe for serious injury.
Can Weather Conditions Affect Beginner Ramp Safety in Texas?
Riding in Morning vs. Afternoon Heat
Early mornings in Texas are cooler and less humid, making them the safest time for beginners to practice. By noon, the sun beats down hard, surfaces heat up, and your body dehydrates faster. Heat exhaustion causes dizziness (loss of balance) slower reaction times leading to falls. Always ride before 10 a.m. or after 6 p.m. during summer months.
How Rain Creates Hidden Dangers
Even after a brief Texas thunderstorm, ramps can remain slick for hours. Water seeps into wooden ramps, making them heavier and more likely to break under impact. Metal coping becomes dangerously slippery. Wait at least 24 hours after rain before riding a wooden ramp. For concrete, check for standing water or algae growth, which creates invisible slippery patches.
Wind and Its Impact on Balance
Texas is known for strong wind gusts, especially in open areas like West Texas or the Panhandle. Wind can push your board or bike off course mid-air during a jump. Beginners should avoid riding when wind speeds exceed 15 mph. If you feel the wind pushing you during a practice session, stop and wait it out. Your center of gravity is still developing, and wind is an unpredictable variable.
How to Fall Safely on a Ramp as a Beginner
The Art of the Controlled Tuck and Roll
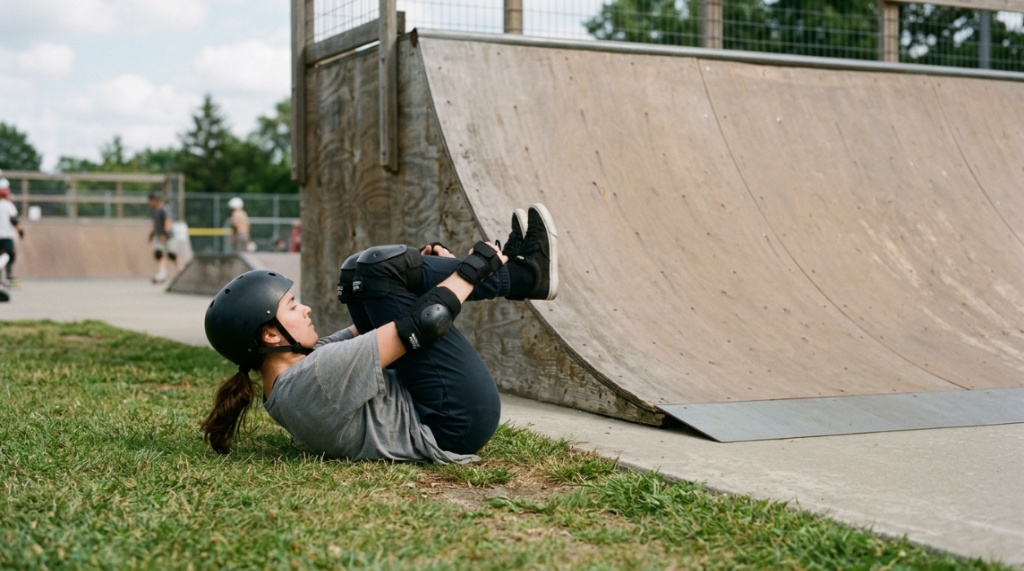
When you feel yourself losing balance, your instinct is to stiffen up and reach out with your hands. That is exactly what breaks wrists and collarbones. Instead, tuck your chin to your chest, bring your arms across your body, and roll onto your shoulder and back. Think of a forward somersault. This distributes the impact across your larger muscle groups and away from your bones. Practice this on grass before you even touch the ramp.
Why You Should Never Fight the Fall
Beginners often try to stay upright at all costs, which leads them to twist their bodies awkwardly. This twisting motion strains knees and ankles. When you sense an inevitable fall, go down. Relax your body and let gravity take you in a controlled manner. The more you fight, the harder you land. Accept that falls are part of learning—every skater and BMX rider has eaten concrete.
Falling Backward: Special Techniques
Backward falls are more dangerous because you cannot see the ground. If you fall backward, tuck your chin immediately to prevent your head from smacking the ramp surface. Let your butt and back take the impact, then roll to one side. Wearing a padded shorts or a tailbone protector is a smart investment for beginners who tend to lean back when they get scared.
Which Riding Techniques Keep Beginners Safer on Ramps?
Speed Control is Your Best Friend
Most beginner ramp accidents happen because the rider is going too fast. On a ramp, speed builds quickly due to gravity. Start with a very small roll-in or push to get just enough momentum to reach the top of the transition without flying over it. Your goal is to ride up to the lip, stop, and roll back down. Once you control speed on the flat section, you can add more speed gradually.
Stance and Body Positioning Matter
Keep your knees bent at all times. This lowers your center of gravity and makes you less likely to tip over. On a skateboard, keep your front shoulder pointed toward the ramp direction. On a BMX bike, keep your elbows out and weight centered over the pedals. Avoid leaning backward, as that shifts your weight over the rear wheel and can cause a sudden slide-out.
How to Stop Safely on a Ramp
Beginners often panic when they cannot stop. On a skateboard, learn to foot brake early—drag your back foot gently on the ramp surface, not hard enough to catch and spin you. On a BMX bike, lightly apply both brakes evenly, but never grab the front brake hard on a ramp because you will flip over the handlebars. Practice stopping on flat ground before you ever ride a ramp.
How to Choose a Beginner-Friendly Ramp in Texas
What to Look for in a Pre-Built Ramp
If you are buying a ramp for your home, look for one with a wide platform (at least 4 feet) and a mellow transition curve. The ramp should have non-slip surface coating or grip tape. Avoid ramps with sharp edges or exposed metal hardware. Check the weight limit—most beginner ramps hold up to 250 pounds, but heavier riders need reinforced construction. For quality options, many riders start their search with beginner ramp safety Texas recommendations that combine affordability with durability.
DIY Ramp Considerations for Texans
Building your own ramp saves money but introduces risk if you lack experience. Use marine-grade plywood that resists Texas humidity. Sand every sharp edge and cover all screw heads with wood filler. The transition curve must be smooth—use a template from a trusted online guide. Test the ramp by walking on it first, then rolling slowly. Never build a ramp taller than 2 feet for your first project.
Public Ramp Etiquette and Inspection
Public skateparks in cities like Austin, Dallas, or San Antonio have ramps of varying difficulty. Walk the park and watch other riders for a few minutes before dropping in. Look for posted park rules and a first aid kit. Ask local riders which ramps are beginner-friendly. Most Texas skateparks have a designated “beginner” section with small ramps and gentle transitions. Use those areas—do not start on the advanced street course.
Is It Safe to Ride Ramps Alone as a Beginner?
The Buddy System Saves Lives
Riding alone is risky for any beginner. If you get injured, no one is there to call for help or drive you to a clinic. Texas emergency rooms see countless isolated ramp accidents that could have been mitigated with a friend nearby. Always bring at least one buddy who understands basic first aid and has a phone charged with emergency contacts ready.
When and How to Ride Solo Safely
If you must ride alone because of schedules or location, take extra precautions. Wear a helmet camera or use a phone with fall detection apps. Tell someone exactly where you are and when you plan to be done. Keep your phone in a pocket that is accessible even if you fall on your back. Never attempt a new trick or a higher ramp when riding solo—stick to skills you have already mastered.
Setting a Time Limit to Avoid Fatigue
Fatigue is a silent enemy of ramp safety. Beginners underestimate how exhausting riding is, especially in Texas heat. Plan sessions of 30 minutes maximum with 10-minute breaks in between. When you feel your legs shaking or your concentration drifting, stop immediately. Tired muscles cause bad decisions. Hydrate with water or electrolytes between sets, not just at the end.Before attempting inclines, ensure you have mastered your balance. If you are struggling with control, you may want to review our guide on Skateboard Stance Mistakes Beginners Make to refine your technique before hitting the ramp
How to Build Confidence Without Sacrificing Safety
Master One Skill Before Moving to the Next
The biggest mistake beginners make is rushing into tricks before they can even ride a ramp smoothly. Spend your first few sessions just rolling up and down the ramp without trying anything fancy. Focus on your stance, your speed control, and your stopping ability. Once you can do ten consecutive safe runs, then try a simple pivot at the top. Progress is built on comfort, not courage.
Use Visual Markers for Consistency
Place a small piece of tape or chalk mark on the ramp at the spot where you want to start your turn or stop. This gives your brain a visual cue and reduces hesitation. Hesitation throws off your balance. With practice, your muscle memory will take over, and you will not need the marks anymore. This technique is used by professional ramp builders to train beginners safely.
Celebrate Small Wins and Track Progress
Ramp riding is intimidating, and it is easy to get discouraged. Keep a simple journal of what you practiced each session and what went well. When you finally ride up and down without putting a foot down, that is a real achievement. Positive reinforcement builds the mental resilience you need to keep trying without becoming frustrated and reckless.
When Should Beginners Upgrade to a Larger Ramp?
Signs You Are Ready for More Height
You are ready for a bigger ramp when you can comfortably drop in from your current height without fear, land smoothly, and ride out every time. You should also be able to fall correctly without injury. If you still get nervous before each run or bail out often, you are not ready. There is no shame in staying on a small ramp for weeks or months.
Transition Speed and Flow Indicators
Watch your video recordings. If your speed is consistent and your body stays loose through the transition, you have developed the basics. Beginners who tense up or overcorrect are not yet ready for steeper angles. A good rule of thumb: if your ramp feels too easy and boring, you might be ready to move up. But even then, make the jump small—add only 6 inches of height at a time.
Why Ramp Progression Should Be Gradual
Skipping steps in ramp height is one of the fastest ways to get hurt. Each additional foot of height doubles the impact force on your body. Your muscles and bones need time to adapt to the new stress levels. Wait at least two weeks of consistent practice before moving to the next ramp size. Patience keeps you riding for years instead of spending weeks healing.
Frequently Asked Questions
What is the most important safety rule for beginners on ramps?
Always wear a properly fitted helmet. It is the single most effective piece of safety gear to prevent life-altering head injuries. No exceptions.
Can I use a regular bicycle helmet for BMX ramp riding?
No. Regular bike helmets lack the extended coverage at the back of the head that BMX and skateboard helmets provide. Use a CPSC-certified multi-sport helmet designed for ramp use.
How do I know if a wooden ramp is safe to ride in Texas humidity?
Press down on the surface with your full body weight. If you feel any give, bounce, or hear creaking sounds, the wood has weakened. Also check for discoloration that indicates rot. Do not ride a ramp that fails the pressure test.
Is it safe to ride a ramp after it rains in Texas?
No. Wait at least 24 hours after rain stops. Wood absorbs moisture and becomes heavy, weak, and slippery. Concrete can develop invisible algae that is as slick as ice.
What should I do if I feel dizzy while riding a ramp?
Stop immediately, sit down in the shade, and drink water. Texas heat causes rapid dehydration and dizziness. Do not resume riding until you feel completely normal. Heat stroke can set in quickly.
How often should I replace my ramp safety gear?
Replace your helmet after any hard impact that compresses the foam. Replace pads when the straps fray or the foam crushes flat. Most pads last 6–12 months with regular use in Texas conditions.
Can I teach myself ramp tricks as a beginner?
It is safer to take a lesson from a local skatepark instructor or watch certified tutorials. Self-teaching leads to bad habits and higher injury risk. Learning proper technique first builds a foundation for safe progression.
Conclusion
Ramp riding in Texas offers unforgettable fun, but it demands respect for the unique conditions of this state—the heat, the humidity, and the variety of ramp surfaces. You now know that safety begins with proper gear, continues with ramp inspection and weather awareness, and depends on controlled techniques and smart progression. You have learned how to fall, when to stop, and why riding with a buddy matters. Every tip in this guide is meant to keep you riding longer, harder, and safer. Do not let this knowledge sit on a screen. Take it to your ramp. Check your helmet straps again. Inspect your ramp one more time. Then drop in with confidence. Your future self will thank you for making safety your first trick.